By: David Burns
In 2008, I began making beekeeping videos on YouTube. At first, it was only a way for me to share what I was learning. Over the years, I have learned to enjoy sharing beekeeping especially with new beginners and one way is by helping beekeepers learn to enjoy inspecting their bees. Over the years I have gathered a wealth of knowledge on the common difficulties, mistakes and inquiries that beekeepers encounter during hive inspections. I’ve taken this information and have simplified key elements to a productive hive inspection.
 1. Plan the Frequency of Your Inspections
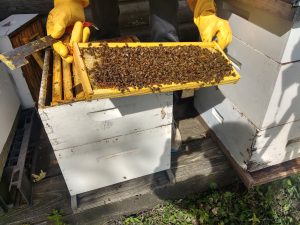
Typically, inspecting your bees twice a month is sufficient, with one of these inspections being brief and focused on specific aspects, such as the queen’s productivity and the need for additional space. This focused inspection should take no more than ten minutes. The second inspection can be conducted two weeks later, during which you can devote more time to observing potential issues. By striking the right balance and tailoring your inspections to the needs of your hive, you can ensure the health and productivity of your bees without causing undue stress or harm.
2. Bring Focus & Specifics to Each Inspection: The Brief Inspection
To ensure an efficient and productive hive inspection, it is crucial to have a well-defined plan in place. Instead of attempting to inspect all twenty or thirty frames, identify specific elements to focus on during an inspection. For instance, you may prioritize a mite inspection or assess your queen’s productivity. This allows you to streamline your inspection and reduce its duration significantly. Not only will this approach be more enjoyable for you, but it will also be less disruptive for your bees. Ultimately, having a clear plan and defined objectives for each inspection can save you time and effort, while helping you achieve the desired outcomes.
Another single focus inspection may be to evaluate the need to add boxes. It’s crucial to assess whether the colony has sufficient room to expand and grow. As a rule of thumb, when one box is filled with five to seven frames of drawn comb, it’s time to add the next brood box or super. This ensures that the bees have ample room to continue building and developing their colony, ultimately promoting a healthy and productive hive. By keeping a close eye on the space requirements of your hive and making adjustments as necessary, you can help your bees thrive and prosper.
 3. Learn To Spot Trouble Quickly & Simply: A More Thorough Inspection
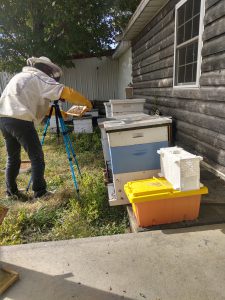
Discovering issues within our colony, such as a mite infestation or disease, is something that no beekeeper wants to encounter. However, it’s crucial to remain vigilant and not let our reluctance to confront problems impede our ability to identify them. For instance, when I inquire about mite counts, I often hear responses like, “I didn’t see any,” which may indicate a subconscious reluctance to detect any potential issues.
A thorough inspection should take place every four to six weeks, dedicated to observing critical issues such as pests and diseases. When conducting this inspection, the first pest you should be on the lookout for is the small hive beetle. As soon as you lift the top, these pests will scatter and can typically be found on the top cover or the tops of frames. Be sure to take notice of their presence, and if you spot an alarming number, it’s time to take action by placing beetle traps between the frames. These traps can help slow down and contain your beetle problem, ensuring that your hive remains healthy and protected.
As you make your way to the brood frames a quick inspection of the open brood can quickly reveal any issues. The larvae should be swimming in a glistening pool of royal jelly and each larvae should be pearly white in color. The bacterial brood disease, European foulbrood, causes the larvae to be discolored, darkened and their spericals to be visible. From just a ten second glance of the larvae, this problem can be diagnosed.
Moving on, take a moment to observe the capped brood – the sealed pupae can provide valuable insights into the health of the brood and the queen. Healthy brood should appear smooth and even, with very few empty cells. This is known as a solid brood pattern and is a positive indication of a thriving hive. However, American foulbrood – another bacterial brood disease – can cause sunken and perforated brood, often accompanied by a foul odor. Keep a sharp eye out for any signs of irregularities, as early detection can be critical in preventing the spread of disease and preserving the health of your colony.
I have a video you may enjoy on YouTube that may help you enjoy your inspections and be better able to assess the condition of your colony.
How To Inspect & Evaluate Your Hive: https://youtu.be/iEEhkJ2Qzx0 or go to YouTube and search for “David Burns Beekeeping.”
Beekeeping can be a rewarding and fascinating hobby, but it also requires careful attention and diligent management to ensure the health and productivity of your bees. By following a few simple guidelines and adopting a focused and well-defined approach to hive inspections, you can minimize disruption, avoid harm to your bees and quickly detect any potential issues before they become more significant problems.

